Station location: Glenden Queensland Australia QG48BU
Operator: Shane Lynd, VK4KHZ
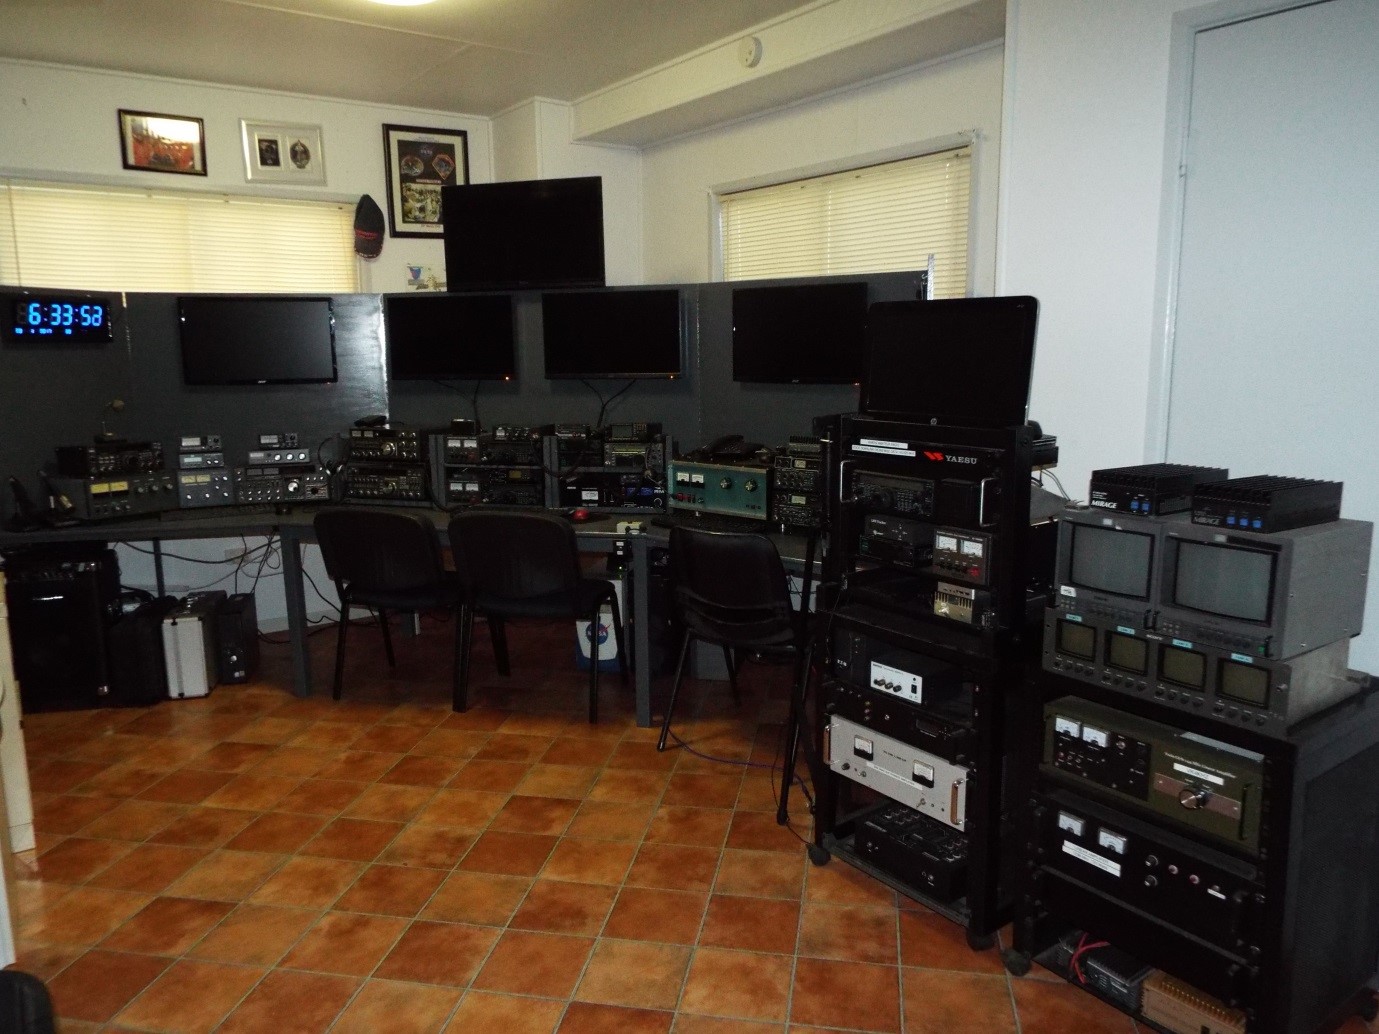
VJ4KHZ is an ARISS VHF-UHF telebridge station as well as a HamTV ground station.
Below is a summary of the HAMTV equipment and any relevant findings observed or experienced during set-up at VK4KHZ in Queensland Australia.
I have assembled three HAMTV stations at VK4KHZ, two are fixed and the other is a portable unit. I will start by providing a brief summary of each key component of each of the stations, the equipment in use and some of the learnings to date so that hopefully anyone intending to assemble a HAMTV ground station from scratch, utilising similar components, may avoid some costly and time consuming errors.
Sincere thanks to Martin VK6MJ for his constant support in exchanging ideas and to Jean Pierre F6DZP for assistance in providing the fantastic analytical software and for assisting me in my initial fault finding which identified a faulty receiver card.
Station 1 – Fixed Station.
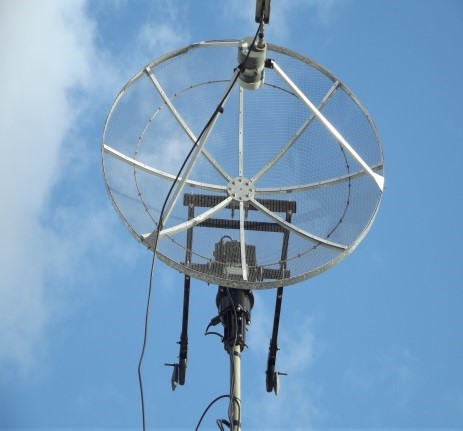
Antenna: RFHAMDESIGN 1.2m prime focus mesh kit dish. This kit is easy to assemble providing you are patient with the assembly and are methodical with your assembly techniques. I did make a minor engineering change to the rim of the dish after placement of the mesh by riveting a section of 30 mm flat strap around the outside of the frame which makes the finish much neater, holds the mesh more securely in place and I believe improves the overall aesthetics of the design. This dish works very well and has provided consistent and reliable reception results.
Antenna Mount: The dish is mounted on a roof mounted ex pay-tv dish mount which is mounted just above the guttering line of the house roof. The vertical pole is 50mm diameter, approximately 1.0m in length and is braced with two 20mm stays. In all quite a rigid and serviceable mount.
Feed: The feed used is an RFHAMDESIGN helix feed designed specifically for HAMTV – LHCP Model LH-13XL. This feed comes as a sealed PVC cylinder, however I did carefully remove the end cap by cutting it off with a hacksaw and replacing the original cap with a replacement push-on cap. I did this so that I could accurately measure the dish focal point distance as it was difficult to determine exactly where in the enclosure the helix started.
Cable: The feeder cable used is commercial grade quad shield 75 ohm coaxial cable with sealed crimp F type connectors fitted.
Converter: I have tried two (2) different brands of LNC in this installation. Initially I used the Spectra Developments SPDC 2400 LNC. This LNC works with HAMTV however at my location this unit seems to suffer slightly from an unknown interference source on 2395 MHz. It should be noted that the frequency conversion of the Spectra LNC is 1000 Mhz which provides for easy conversion to the satellite receiver. I am now currently using the Kuhne MKU23TM in this installation as it seems to work much better for me and I am not affected by the interference issues previously noted.
Rotator & Controller: I am using the Yaesu G5500 (I could not find a supplier of SPID rotators in Australia otherwise I would have purchased one for comparison). I have three of the Yaesu (Kenpro) units and the standard controllers and they all behave with slight (and sometimes frustrating) differences. If you have one of the earlier models I would recommend that you perform a minor modification to the power supply unit in order to provide better voltage stability (addition of a capacitor), I have soldered a 1uf, 25v tantalum capacitor under the board between the voltage regulator’s output lead (+) and ground (-). I note that the latest model of the G5500 has this modification completed. The thing that I have learned about these rotators is that they can be used successfully for HAMTV use however some patience and persistence may be required during the initial calibration process to make sure that you get the calibration 100% accurate before installing. I have one unit which calibrated very easily using the process described in the Yaesu owner’s manual, however the other two units took some time and patience to calibrate accurately. I would recommend that you calibrate the rotators on the ground rather than mount them on your mast/tower and then try and do the calibration from the roof or ground. The dish mount I use is a custom built unit C/W adjustable sliding counterweight arms which are adjusted to find the balance point of the dish when mounted on the rotator – I consider this to be critical as using this method can greatly reduce the effects of “play” between the rotor gears during high elevation passes. The counterweights which I used are weightlifting barbells as they are heavy, cheap and easily available.
Antenna Tracker: I currently use an LVB Tracker (available from AMSAT) at my fixed station, however before calibrating the LVB Tracker I did calibrate the rotator controller using my Yaesu GS232B antenna tracker – (I simply found that by using the GS-232 to calibrate the rotator controllers before installation was the easiest approach) and then calibrate the LVB tracker to match the rotator.
Computer: Dell 990 Desktop, 3.1GHz, graphics card, 250 GB, Windows 7 32 Bit system dedicated for HAMTV use
Software: TUTIOUNE analytical software suite by F6DZP, DirectX, Adobe FMLE & VCAM
Satellite Receiver: TechnoTrend TT S2-1600 PCI Card. It is worth noting that the initial card which I purchased and installed into the PC, I spent literally weeks trying to get it to work, and without success. It was only after I contacted Jean-Pierre F6DZP (just in case I was doing something wrong with the software) and a series of tests were performed in which we determined that the receiver card was in fact faulty. I purchased a replacement card and it worked first up. I must say that without Jean-Pierre’s support and Martin (VK6MJ) persistence in convincing me not to give up I would most likely have shelved the project.
Tracking Software: I have settled on using SatPC32 on all three (3) of my tracking stations for no other reason than the fact that I like it, and it has never let me down. The set up process is pretty much self-explanatory however if anyone is experiencing difficulty please feel free to contact me and I should be able to assist, having tried most of the settings.
https://www.youtube.com/watch?v=rZJRH17x0FI
Station 2 – Fixed Station.
Antenna: Same as station 1
Antenna Mount: Same as station 1
Feed: Same as station 1
Cable: Same as station 1
Converter: Kuhne MKU23TM
Rotator & Controller: Same as station 1
Antenna Tracker: Same as station 1
Computer: Dell 990 Desktop, 3.4Ghz, graphics card, 500 GB, Windows 7 64 Bit system dedicated for HAMTV use
Software: TUTIOUNE analytical software suite by F6DZP, DirectX, Adobe FMLE & VCAM
Satellite Receiver: TechnoTrend TT-3200
Tracking Software: SatPC32
Station 3 – Portable Station
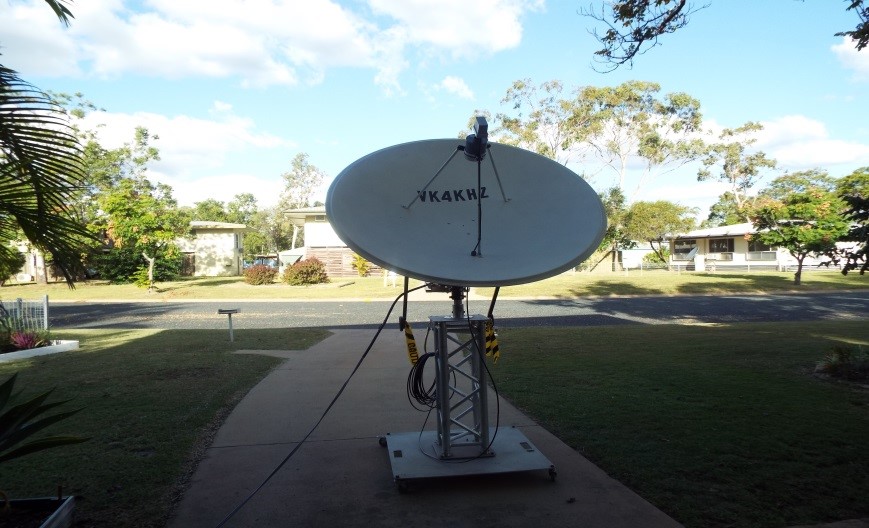
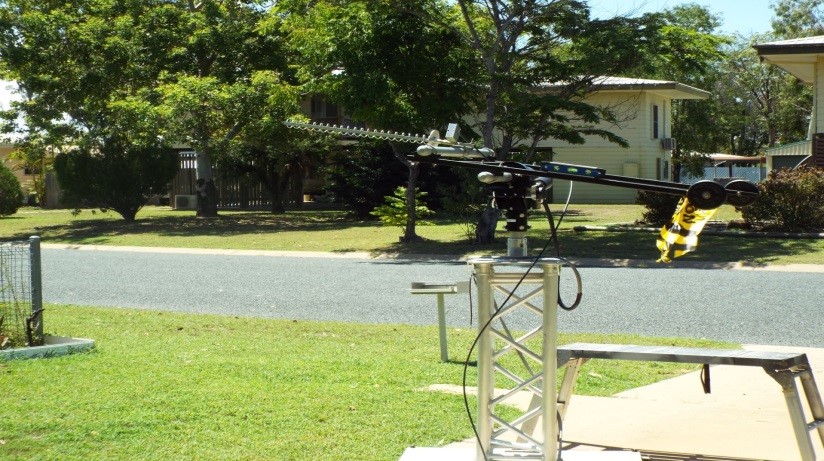
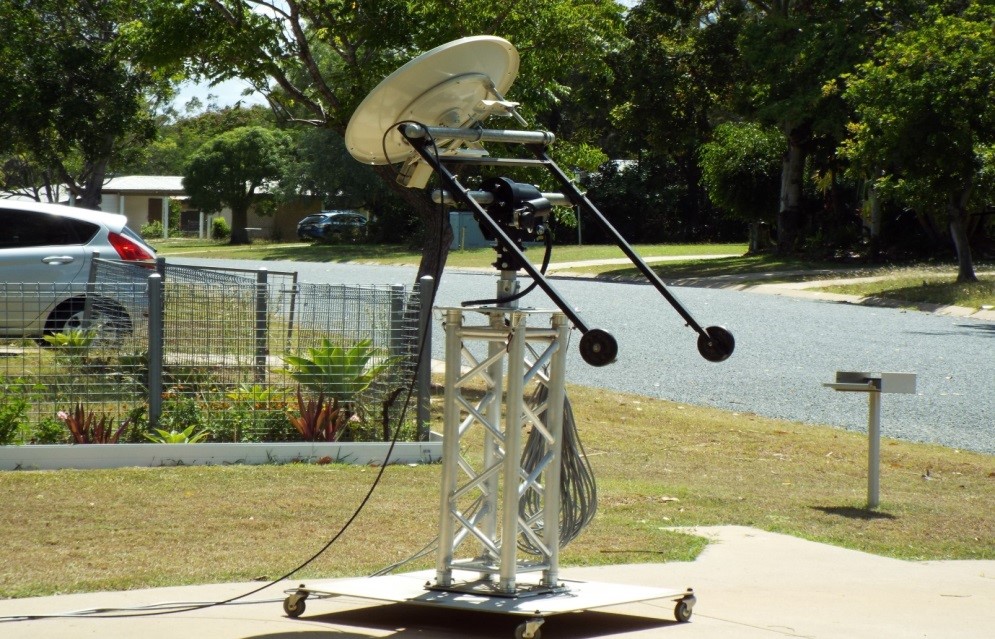
Antenna: Initially a 1.6m steel petal dish however I am now experimenting with an Ex commercial 1.6m solid aluminium prime focus dish with a custom built light weight mount.
https://www.youtube.com/watch?v=lwKrLAx5FNg
Antenna Mount: 1.2m section of aluminium lighting tower mounted on an aluminium tilt over base with hinge and fitted with heavy duty locking trolley wheels. This unit fits easily into the tray of my vehicle (Toyota Hilux).
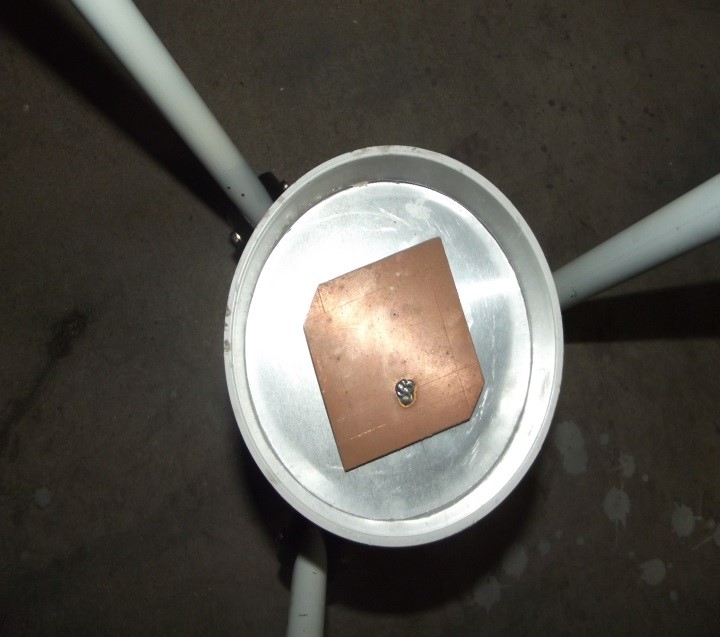
Feed: Home-made 2.4G patch feed made from 100mm sewer pipe (un-used!) aluminium sheet and single sided PCB board.
Cable: The feeder cable used is commercial grade quad shield 75 ohm coaxial cable with sealed crimp F type connectors fitted
Converter: Currently using a Kuhne MKU23 (not the TM model) built into a home-made weatherproof enclosure. This particular model comes without a weatherproof enclosure.
Rotator & Controller: SPID RAS
Computer: Dell 990, 3.4Ghz, Graphics Card, 500Gb, Windows 64 Bit system
Software: MINITUTIOUNE analytical software suite by F6DZP, DirectX, Adobe FMLE & VCAM
Satellite Receiver: MiniTiouner
Alignment: Alignment is completed using a spirit level and a Garmin GPS each time the system is moved. To date it has proved to be a relatively simple process.
Additions –
During the month of January 2017 I eagerly took delivery of one of the new ARISS MiniTiouner HAMTV receivers.
On 24th February 2017 my SPID RAS AZ/EL Rotator arrived just in time for the weekend. On the evening of the 24th I wired everything up in readiness for calibration on Saturday morning. After some initial set-up issues it has performed faultlessly and is a much better option than the Yaesu G5500.
Being a typical radio ham the first task was to remove the covers from the enclosure and take a look inside. The installation layout and assembly of the tuner board was installed neatly with all cabling securely cable tied and fastened to the receiver board mounts. In all quite a nice neat job. I did note however that the USB connection socket which was designed to be mounted to the external face of the enclosure, for some reason, was mounted inside the enclosure and fastened (glued) in place with silicone sealant (not screwed). After plugging in my USB cable into the USB socket a couple of times the silicone sealant holding the socket in place broke away, so I ended up mounting the socket on the external face of the enclosure with a couple of small screws.
Overall, I was quite impressed with the general aesthetics of the receiver as well as the neatness of the internal component layout
Operationally
From an operations perspective I found that the MiniTiouner was very easy to setup and get going. The instruction sheet that was supplied with the receiver is very easy to follow and if you follow the step process described, then it is highly unlikely that you will encounter issues – I have now set up four separate PC’s to work with my MiniTiouner and all were very easy to set up and get working.
First Test
The first test of my MiniTiouner was a very pleasing and surprising experience.
For my first test I set the MiniTiouner up utilising one of my “contingency” desktop PC’s. The coaxial feed from my 1.2m mesh dish which was initially connected into one of my other HAMTV dedicated desktop PC’s (with TT1600 card) was disconnected and then reconnected into the input of a two way satellite signal splitter which had power pass to one of the ports to enable powering of the dish mounted Kuhne LNC. Two small patch leads were then made up to connect the MiniTiouner and the TT1600 PC to the splitter ports with the MiniTiouner powering the LNC and sharing the one dish.
My first test involved a 48 degree pass with the ISS. The ISS was approaching from the SW heading NE. On this particular pass I was surprised to find that the MiniTiouner received signal lock 4 second prior to the TT1600. During this pass both receivers achieved similar results however the MiniTiouner received signal lock first and was the last to lose the signal after just over 4 minutes.
Extended Testing
Since the initial test of my MiniTiouner I have conducted several basic configuration tests involving swapping splitter ports for comparison, trying various stand-alone antennas – 21 turn Helix & 600mm solid prime focus dish and in ALL cases the MiniTiouner has outperformed both the TechnoTrend TT1600 and TT3200 receiver cards by receiving signal lock on average 3 to 4 seconds earlier than the TT1600 and up to 8 seconds prior to the TT3200. I have no test equipment to conduct proper scientific tests with respect to S/NR or sensitivity.
In summary, I would recommend the MiniTiouner as the receiver of choice to anyone considering setting up for HAMTV reception. It is well made, easy to set up and provides consistent and reliable results.
Additional notes;
HAMTV Equipment used for various tests –
Dedicated HAMTV desktop PC running Windows 7 32 bit system fitted with TechnoTrend TT1600 receiver card
Dedicated HAMTV desktop PC running Windows 7 64 bit system fitted with TechnoTrend TT3200 receiver card
Dedicated HAMTV desktop PC running Windows 7 64 bit system set up for ARISS MiniTiouner receiver.
RFHAM DESIGN 1.2m mesh dish (roof installation) mounted on Yaesu G5500 rotator and steered by LVB tracker running SATPC32.
21 Turn Helix mounted on SPID RAS rotator. This system is ground mounted on wheels and is used for testing several antenna configurations.
600mm solid prime focus dish with linear feed which is also mounted on the SPID RAS rotator.
1.6M Solid Andrews prime focus dish fitted with home-made patch antenna (under test)
Kuhne MKU LNC23TM LNC (x3)
Spectra SPDC2400 LNC
SAT2PPIRA – 2400Mhz 2WAY Power Pass splitter
Quad Shield 75 Ohm Coaxial Cable (PAYTV grade)
Other Notes worth mentioning:
The mounting clamps on the elevation rotator should be replaced with better quality heavy duty clamps (available at local TV antenna retailer) the mounts that come with the rotator are light duty.
The LNC should be mounted as close as practicable to the input of the dish feed and sealed from the weather.
If the length of control cable feeding the AZ/EL rotators is changed it would be wise to again check the calibration of the rotators as I changed from 15m control cables to 25m control cables and found that this change caused a minor discrepancy in the accuracy of the rotators.
Getting the dish feed focal length correct (within a few millimetres) can and does make a difference. My view is the RFHAMDESIGN helix feed should not have the end cap glued in place.
Try and mount your dish as clear as possible from any obscuration – especially trees and foliage.
The Kuhne MKU23TM is NOT waterproof, only weatherproof. Be aware of this especially when it is raining and when the dish is operated in flip mode.
I have found that both the Win 7 32 & 64 BIT operating systems work fine although I have not tried the S2-1600 card in the 64 BIT system, however the S2-3200 card was relatively easy to set up and get working so long as you install it in Administrator account.
Both the helix feed and the patch feed have their individual advantages – I am still testing the two feeds but so far I have only noted minor performance differences in two types of feed. BTW – The patch feed is very easy to construct.
